")
")
")
")
")
")
")
")
")
")
")
42 Inch LCD LED Digital Advertising Display Board Screen
CALL FOR LATEST PRICE
Hotline: 01999-995860
?দাম জানতে সরাসরি ফোন, হোয়াটসঅ্যাপ অথবা ফেসবুক পেইজে মেসেজ দিন।
1.Play video to video in seamless;
2.Built-in 8G Nand flash(7.1G can use),can use USB copy files to Nand flash with the copy speed 10M/s;
3.Can rotate the video file 90/180/270 degree, the menu also can rotate 90/180/270 degree;
4.High display color and sharpness;
2. User Manual
2.1 Remote Control
Compare
42 Inch LCD LED Digital Advertising Display Board Screen
1. General Description
The advertising player board can support the LCD of LVDS interface with resolutions up to Full HD (1920X1080). The CPU is 1GHZ of A9 with 256M memory.
1.Play video to video in seamless;
2.Built-in 8G Nand flash(7.1G can use),can use USB copy files to Nand flash with the copy speed 10M/s;
3.Can rotate the video file 90/180/270 degree, the menu also can rotate 90/180/270 degree;
4.High display color and sharpness;
2. User Manual
2.1 Remote Control
THE KEYS:
Power: control the power on and off
Mute: silence of the player
-Fast-forward by 3 seconds
– Fast rewind by 3 seconds
– PLAY/PAUSE
-Move the pointer up
-Move the pointer left
– Move the pointer right
-Move the pointer down
MENU: Enter setting menu, then confirm in the menu
VOL+:Volume up
VOL-:Volume down
: Next item when playing photo or video mode
: Previous item when playing photo or video mode
EXIT: Escape from the menu and playing state
DELETE: When pointer stays in the document, can delete the select file
1.Menu Language:
简体中文:the language is Simplified Chinese
繁体中文:the language is traditional Chinese
English:the language is English
Korean:the language is Korean
2.Local ID:
Set the ID of the machine, press MENU key to set the number, press UP and DOWN key change the number.
3.No files Auto Off:
Set it on, the machine will power off if there is no playable file.
4.Banner Setting:
Show a logo photo on the left or right screen,the requirement of the logo photo as follow:
Photo name:banner.png
Resolution:280*100
5.Time Volume:
Setting the volume of the machine in the time period.
6.System Reset:
Reset the settings of the machine.
2.2.2 Play Setting
1.Photo Show Time:
Set the time of changing into the next picture.
2.Play Type:
Picture: Only play the picture files of root catalogue
Picture-Music Sync: Play the pictures with the background music repeatedly.
Video: Only play the video files of root catalogue
Pic Video: Play video and pictures files
As list: Playing according to the list.
Split Screen: Play according to the split
All: Play all the files that can be identified(include root files and split files,but not include the playlist file)
3.Photo Slide Mode:
Set the switch mode of pictures.
4.Scaler Mode:
Set the display scaler mode of pictures.
5.Split Setting:
Split Mode:
User: play the split file in the folder of “split” witch create by the split tool.
Mode1~Mode4:the four mode of split are fix on the board, user can change the mode by own. The video files should in the folder of “video”.
There are most 5 picture window, the 5 window file are in the folder “image1”, “image2”,“image3”,“image4”and “image5”.
Use the split tool make the split mode and create the SPLITSCREEN.TXT. Then modify the file name like follow:
Mode1: SPLIT_MODE1.TXT
SPLIT_MODE1_FRAME.png (the background picture)
SPLIT_MODE1_SAMPLE.png(the preview picture of the Menu)
Mode2: SPLIT_MODE2.TXT
SPLIT_MODE2_FRAME.png (the background picture)
SPLIT_MODE2_SAMPLE.png(the preview picture of the Menu)
Mode3: SPLIT_MODE3.TXT
SPLIT_MODE3_FRAME.png (the background picture)
SPLIT_MODE3_SAMPLE.png(the preview picture of the Menu)
Mode4: SPLIT_MODE4.TXT
SPLIT_MODE4_FRAME.png (the background picture)
SPLIT_MODE4_SAMPLE.png(the preview picture of the Menu)
Attention: the resolution of the sample png should be 250*150 in horizontal while 150*250 in vertical.
Photo Show Time: Photo change the next file time.
Split Update: Change the split mode.
2.2.3 Subtitles Setting
Subtitles On Off: Set the rolling subtitles turning on or off.
Font Color: Set the color of the subtitles
Font Size :Set the size of the fonts
Subtitles Speed: Set the rolling speed of the subtitles
Background Color: Set the background color of the rolling subtitles
Subtitles Position: show subtitles at the top, in the center or in the bottom of the screen
2.2.4 Clock Setting
Set time of the machine, press “Save The Time” to update.
2.Time Position:
Set the time display position.
3.Time Display:
Set the time display mode.
4.Time Color:
Set the time display color.
5.Timer setting:
1. Timer1:
Set the timer1 setting.
2. Timer2:
Set the timer2 setting.
3. Timer3:
Set the timer3 setting.
4. Timer4:
Set the timer4 setting.
5. Timer5:
Set the timer5 setting.
6. Prohibit Manual Off:
Prohibit power off in IR & keypad when timer is on.
1. Timer mode:
Every day: Effective every day
Monday- Friday: Effective from Monday to Friday
Saturday-Sunday: Effective rom Saturday to Sunday
Saturday: Effective on Saturday
Sunday: Effective on Sunday
Off: Disable
2. Power on timing:
Set the time of power on
3. Power of timing:
Set the time of power off
Note: Power off time should be longer than power on time. The time
options should be in order, from early time to late time.
Related products
-
Accessories, Charger / Switch / Power Socket / Multi Plug, Electric & Electronics
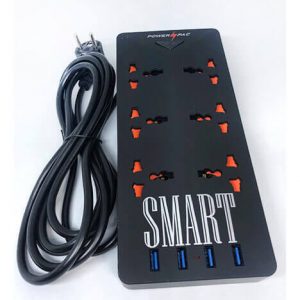
Power Pac 4 USB RU-S4 6 Outlets Anti Static Power Strip Multi Plug
 Accessories, Charger / Switch / Power Socket / Multi Plug, Electric & Electronics
Power Pac 4 USB RU-S4 6 Outlets Anti Static Power Strip Multi Plug
Power Pac
RU-S4 Aliens
6 ports
5 USB chargerCALL FOR LATEST PRICE
Hotline: 01999-995860
?দাম জানতে সরাসরি ফোন, হোয়াটসঅ্যাপ অথবা ফেসবুক পেইজে মেসেজ দিন।
SKU: n/a -
Accessories, Camera Accessories, Electric & Electronics, Microphone / Earphone / Headphone / Earbuds
AWEI T13 Bluetooth Earphone Dual Driver Wireless Headphones HiFi Stereo Sound Headset Earbuds With Mic Fone de ouvido For Phone
 Accessories, Camera Accessories, Electric & Electronics, Microphone / Earphone / Headphone / Earbuds
AWEI T13 Bluetooth Earphone Dual Driver Wireless Headphones HiFi Stereo Sound Headset Earbuds With Mic Fone de ouvido For Phone
Brand Name:Awei
Connectors:USB
Control Button:Yes
Active Noise-Cancellation:Yes
Style:Neckband
Communication:Wireless
Vocalism Principle:DynamicVolume
Control:YesWireless
Type:Bluetooth
Support Memory Card:NoWith
Microphone:Yes
Model Number:T13CALL FOR LATEST PRICE
Hotline: 01999-995860
?দাম জানতে সরাসরি ফোন, হোয়াটসঅ্যাপ অথবা ফেসবুক পেইজে মেসেজ দিন।
SKU: n/a -
Electric & Electronics, Smart Phones / Button Phones / Land & IP Phones
Infinix Smart 3 Plus 3GB-32GB Smartphone Mocha Brown
 Electric & Electronics, Smart Phones / Button Phones / Land & IP Phones
Infinix Smart 3 Plus 3GB-32GB Smartphone Mocha Brown
CALL FOR LATEST PRICE
Hotline: 01999-995860
?দাম জানতে সরাসরি ফোন, হোয়াটসঅ্যাপ অথবা ফেসবুক পেইজে মেসেজ দিন।
Brand Infinix
Model Smart 3 Plus
Battery capacity 3500 mAh
Release date April 2019
Screen size (inches) 6.21
Touchscreen Yes
Resolution 720×1520 pixels
Protection type Gorilla Glass
Aspect ratio 19.5:9
Pixels per inch (PPI) 269
Processor 2GHz quad-core
Processor make Helio A22
RAM 2GB
Internal storage 32GB
Expandable storage Yes
Expandable storage type microSD
Expandable storage up to (GB) 256
Dedicated microSD slot Yes
Rear autofocus Phase detection autofocus
Rear flash Dual LED
Front camera 8-megapixel
Rear camera 13-megapixel (f/1.8) + 2-megapixel
Operating system Android Pie
Skin XOS 5.0
Wi-Fi Yes
Bluetooth Yes, v 5.00
Micro-USB Yes
Headphones 3.5mm
FM Yes
Number of SIMs 2
SIM Type Nano-SIM
Face unlock Yes
Fingerprint sensor Yes
Proximity sensor Yes
Ambient light sensor Yes
Launched in Bangladesh Yes
Form factor Touchscreen
Dimensions (mm) 157.00 x 76.00 x 7.80 mm
Weight 148 g
Removable battery No
Colors Mocha BrownSKU: n/a -
Accessories, Camera Accessories, Computer Accessories, Electric & Electronics, IPS / UPS / Stabilizer / Battery / PowerBank
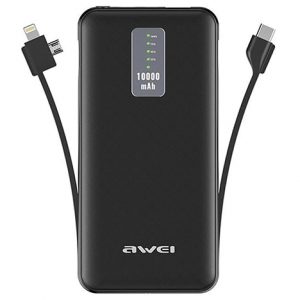
AWEI P11K Premium 3 IN 1 Power Bank 10000MAH
 Accessories, Camera Accessories, Computer Accessories, Electric & Electronics, IPS / UPS / Stabilizer / Battery / PowerBank
AWEI P11K Premium 3 IN 1 Power Bank 10000MAH
CALL FOR LATEST PRICE
Hotline: 01999-995860
?দাম জানতে সরাসরি ফোন, হোয়াটসঅ্যাপ অথবা ফেসবুক পেইজে মেসেজ দিন।
?প্রোডাক্ট অর্ডারের পূর্বে সাপোর্ট থেকে সর্বশেষ মূল্য, স্টক এবং ডেলিভারি সম্পর্কে জেনে অর্ডার করার জন্যে অনুরোধ করা যাচ্ছে।– Model: P11K
– Battery capacity: 10000mAh
– Micro USB input: 5V / 2A
– Type-C input: 5V / 2A
– USB-A ouput: 5V / 2.4A
– Micro USB output: 5V / 2.1A
– Lightning output: 5V / 2.1A
– Type-C output: 5V / 3A
– Dimensions: 76mm x 14.8mm x 145.3mm
– 1 Year WarrantySKU: n/a